Let’s be real – gift giving can be tricky and often stressful at this time of the year. Our goal is to help alleviate that stress and share some options for the different paddlers in your life with this Grey Duck Gift Guide!
Give back to the organizations who are working tirelessly year-round to make this world a better place.
Written by Jody Henseler, Team Grey Duck
Visiting the shores of Lake Michigan this paddling season?
Then bring your board, do a little research, and check out some of the shallow water shipwrecks along her shore. We are home to the newest NOAA Sanctuary - the Wisconsin Shipwreck Coast National Marine Sanctuary. Map out your plans and set your GPS by visiting the Wisconsin Sea Grant and Wisconsin Historical Society’s website dedicated to mapping the wrecks at https://www.wisconsinshipwrecks.org/.
I’ll see you on the water…
The Major Anderson, Two Rivers, WI https://www.wisconsinshipwrecks.org/Vessel/Details/408
The Continental, Two Rivers, WI https://www.wisconsinshipwrecks.org/Vessel/Details/119
The Major Anderson, Two Rivers, WI https://www.wisconsinshipwrecks.org/Vessel/Details/408
]]>It has been approximately six months since my last paddle. The last time I went this long without being on the water was years ago. You can probably imagine how I'm feeling. I'm ready to get back out there! The lakes around where we live in northern Maine are just starting to break free from winter's icy grasp and the river is finally navigable with melt-off.
Spring is springing in most parts of the US. However, water is slower to heat up (and cool down) than air which can yield a sixty degree, sunny spring day with a lake temperature of 45 degrees or lower. No matter your skill level, a paddler should always be prepared for immersion because the body will lose heat in water four times faster than in air of the same temperature. That doesn't mean you need to wait until summer to enjoy the water, it just means cold water paddling requires extra considerations even as the air starts to warm up.
Different people have different definitions of cold. When I lived in Hawaii, I got pretty used to the 80 degree ocean and it didn't have to be much colder than that for me to be uncomfortable. Personal preferences aside, water that is 60 degrees or below can quickly lower body temperature to a dangerous level. Falling in the water can literally take your breath away as your nervous system automatically responds to the cold. Gasping for air can make it harder to stay calm and get back on your board quickly. Wearing your properly fitting personal floatation device (PFD) will make this easier and it also provides some insulation for your core. If it is tucked in the bungies on your deck, or somewhere on shore, it won't help you. If the water is cold, wear it.
Wearing a wetsuit or dry suit is the best way to safely paddle on cold water. A wetsuit is made of neoprene and comes in various thicknesses, measured in millimeters. As the name suggests, wetsuits let you get wet, but the snug fit keeps a little bit of water close to your skin where it gets warmed by your body. A common style for paddlers is called a Farmer John or Farmer Jane, which is a wetsuit without sleeves allowing for excellent shoulder mobility, usually 2-3mm thick. You can also find neoprene pants or capris and long or short sleeved tops to fit your preference for coverage. I always wear a sun shirt under my neoprene vest to wick moisture away from my skin. Unless both the air and water are hot, cotton clothing shouldn't be worn on the water because when it gets wet, it stays wet and cold. A dry suit, on the other hand, is a waterproof suit with latex gaskets at the wrists and neck to keep water out completely. These are specialized for more extreme conditions, and mine was a game changer for me on Lake Superior with water temperatures below 40 degrees. Neoprene boots and gloves can be worn with both wetsuits and dry suits.
Make sure to have warm clothes handy. Wool socks, a fleece and a towel will fit in a dry bag. As with any outdoor activity, a buddy can make an outing safer and more enjoyable. Always let someone know where you're going and when you expect to be back. Know your limits and have fun!
]]>- - - - - - - - - - - - - - -
Twin Cities based Grey Duck Outdoor is pleased to announce the addition of Dan Arbuckle of Headwaters Distribution as Western US sales representative.
“Dan’s deep knowledge of the paddlesports industry, his love for quality and innovative products, and his ‘boots on the ground’ approach to serving the needs of specialty retailers make him the perfect partner as we continue to grow Grey Duck beyond our Midwest roots”, says Grey Duck owner Rob Bossen.
As part of the partnership with Headwaters Distribution, Grey Duck will be utilizing their Northern CA / Southern OR warehousing capabilities to support the growing needs of specialty retailers in the western US. This location will begin receiving inventory in 2022, with plans to be fully operational for the 2023 season.
"I've been looking for the right SUP line to add to our portfolio of brands for the past few years, but wanted to make sure we had the right partner. Grey Duck checked all of my boxes. High value for the end user without sacrifice to quality, variety of materials and designs to cover our diverse customer needs, and a smart sustainable business model that will be around for years to come. I look forward to our partnership and bringing these exceptional boards to the West Coast market."
Rob Bossen states, “We’ve always believed that building great products, humbly serving the needs of specialty outdoor retailers, and providing best-in-class customer service is the formula for long term success. The addition of Headwaters Distribution will extend our ability to achieve this vision, and we couldn’t be more excited to be working with Dan on this endeavor”.
]]>I know it goes without saying that times are weird, so I'll get right to the point. We are experiencing unprecedented demand coupled with supply chain issues, which we expect to continue through the spring.
We are in the process of receiving in our 2022 boards, which will arrive in waves over the coming months. Our Dark Wood Coast and Coast Hybrid models have arrived and are available for purchase, with other models arriving shortly:
All Inflatable boards - November
All Other models - December/January
We'll continue to fill in with additional inventory through the winter and into spring and hopefully be fully back in stock by late spring.
If you have questions on availability, what board models the dealers near you may be receiving next spring, or just a general question, please feel free to text me (612-441-2155) and I'll do my best to get back to you as quickly as possible. Please include your name, email, city in which you reside, and your specific question and I'll turn around answers as quickly as possible.
Thanks for your continued patience and support. We appreciate you and your business.
Best wishes,
Rob
Owner - Grey Duck Outdoor
]]>]]>
There are two main shapes for stand up paddle boards: the all-around and the displacement hull. Both board types will offer different experiences. Some paddlers will have a preference on board shape and we'll offer up some pros and cons for each type.
]]>
Your average all-around board has a rounded tip in the front, will be slightly wider and is fairly flat. It will resemble a traditional surfboard shape but will be larger in size. You'll see many entry-level boards in this style but that doesn’t mean the board is for beginners only. The biggest reason all-around boards are recommended for beginners is for the balance. With the wider board, it offers extra stability which can help tremendously when you are just starting out.
For the more seasoned paddler, using an all-around board can be great when you add in a workout like yoga or conditioning. It’s nice to have the added balance when you are moving around the board more than usual. All-around boards are also great for those lazy summer paddles or bringing along a kiddo or a pup. If you aren’t worried about taking your time, if you are more interested in jumping in the lake or brining along a friend, an all-around is a great option.
The displacement hull board, also called a touring board, has a more streamlined look to it with the pointed tip in the front and slightly narrower width. The design of the displacement hull board is meant to help paddlers cut through the water quicker and with less resistance. This can make for a more enjoyable experience for an intermediate or advanced paddler when they are ready for longer paddles or generally wish to go faster.
After spending some time on an all-around board and moving to a displacement hull, you'll notice that you have more control. You'll notice you are able to propel yourself forward quicker and turn faster. The trade off is that you will work harder to keep your balance because the board will rock side to side more easily. If you have been using an all-around board and are looking to upgrade or challenge your balance, or if you have some previous experience paddling, a displacement hull board may be for you.
All in all, there's no wrong choice when it comes to paddle boards. It all depends on what works for you and what you are looking to get out of your paddle boarding experience.
What your emergency bag could and should look like, will vary depending on where you’re paddling, the length of your trip, and the water and weather conditions. For those of us going on a short paddle around the local lake, our emergency bag may look quite a bit different from someone going on a multi-day excursion. No matter the paddle, there are a few essential items you should always have on you. We’ll break down our must-have items for all paddle adventures and what we’d include on longer day or multi-day trips.
Water - No matter the length of the paddle trip, we always have water on hand. There’s nothing cooler than being hydrated!
Sunscreen - If it’s sunny or cloudy, sunscreen is important for keeping you protected. The reflection of the sun on the water can increase your risk of sunburn. Also, if you fall in or jump in the water, your previously applied sunscreen can wear off more quickly leaving you vulnerable to sun damage, heatstroke and/or dehydration. **See our recommendation for water above
Life Jacket - This should be a given since it’s the law but bring a life jacket. Even the best of swimmers can find themselves in a situation where they need a life-saving flotation device. Don’t go out without one.
Whistle - The DNR recommends tying a whistle to your life jacket in case of emergencies. In the off chance you end up in the water and can’t get to shore, a whistle can be helpful for getting someone’s attention.
Leash - Depending on where you are paddling, there are different types of leashes you should wear. If you are paddling on a river, please be aware of the dangers of having your leash get tangled underwater and make sure you have a proper quick release option. However, with lake paddling, having a leash can help keep you from losing your board if you fall in the water.
Spare Fin Screw - These guys are small, easy to drop and easy to lose. Don’t get stuck without one. Trying to paddle without a fin is extra work you don’t want to do. We recommend these hand tightening screws in case you also misplaced your screwdriver.
Screwdriver - If you’ve moved to all hand tightening screws, good for you! Feel free to skip this recommendation. If you are still using normal fin screws, don’t forget your screwdriver for taking your fins on and off as needed.
Snacks - Depending on the length of your trip, you may want to bring a snack or multiple snacks. This can be helpful if you get stranded somewhere and your trip time is extended longer than you anticipated. It can also be nice to have if you want to have an impromptu picnic in the middle of the lake.
First Aid Kit - For any bumps, bruises or scrapes that may occur, having a small first aid kit can be helpful. For longer, multi-day trips, you’ll want to expand your first aid kit in case a more serious injury occurs and you can’t get immediate help.
Epoxy Puddy & Sandpaper (200 grit) - In case your board hits something other than water like a rock, a tree, or something man-made, you can use sandpaper to smooth down any nicks and apply epoxy putty for a quick seal.
Flashlight / Headlamp - For those of you taking longer day trips or overnight trips, bring a flashlight or headlamp in the off chance that you are paddling in the dark or are stranded on land.
Foil Emergency Blanket - While you should always be dressed appropriately for the current water temperature and weather, a foil blanket can be a good backup.
Emergency Paddle - Don’t get stuck down creek without a paddle! Especially on longer multi-day trips, bringing an emergency paddle along is a good idea. There are some inexpensive options that won’t take up a lot of space but can get you out of a bad situation. We recommend this telescoping option by Seachoice.
]]>"Beauty. Quality. Family. Economy. These are the reasons why I chose to begin paddling GreyDuck 3 years ago." A story by brand ambassador Jody Henseler.
]]>Quality.
Family.
Economy.
These are the reasons why I chose to begin paddling Grey Duck 3 years ago.
I have been an avid canoer since I was 4 years old, when my dad bought our brand-new shiny, aluminum Gruman canoe. Being small, he made me my very first paddle so that I could help propel that craft--it was a big deal to me, as I still have it.
I paddle, help build, and restore cedar-strip and wood-canvas canoes. It is a love for the beauty of the wood, the aesthetics of a hand-crafted canoe, the history of how the canoe was used in this upper midwest region, and because paddling is… the best!
To propel a craft with the dip and swing of the paddle, is to me, primordial. It fulfills a need, an ache that reaches to my soul. When you move your craft silently across the water, you achieve a zen-like state of being. You and the water become one. You roll, as it rolls. The smells. The sounds. The feel. It is unique unto itself and may be hard to understand if you’ve never paddled alone, on an early misty morning -- so give it a try.
Before buying my first Grey Duck board, I spent 2 months paddling different brands and types of boards. I knew what I was looking for. I wanted a high-quality, foam core/epoxy construction, light-weight, superior finished, great performing board. So when I came out of the Boundary Waters Canoe Area Wilderness after a 7-day canoe trip, and stumbled upon Rob from Grey Duck who was demoing his boards in Grand Marais with retailer Stone Harbor, I jumped at the chance to give them a try -- and I fell in love, buying one on the spot. Because they did not have the board I wanted in stock, Rob personally delivered mine to my house! Now that is family, that is commitment, and that is a company I can fully get behind.
Grey Duck paddle boards are beautiful -- they just are. They are everything that I wanted in a paddleboard and then some: clean lines, well-designed graphics, intriguing deck pads, with well-planned and placed handles and bungees.
Grey Duck is Freedom -- I am able to throw my 12’6” Journey on and off my car on my own. It is light-weight and easy to handle, giving me the opportunity to paddle whenever and wherever I want to.
Grey Duck is Adventure -- I love to paddle on beautiful, pristine, clear water. This has become my quest; to find the best waters to take me to new and unique areas, and give me experiences that I can photograph and share. Always wanting to intrigue and inspire others to get out, paddle, and live.
Grey Duck is Fitness -- I love nothing more than to begin my day around 6 or 7 in the morning, on calm waters of Lake Michigan, paddling north or south from my put-in, and seeing how far I can get, what I can see, and then to sit/lie on my board and relax. On inland lakes in my area, nothing beats getting a group of friends together to enjoy an early evening session of paddleboard yoga to relax and laugh and end the day on a positive note.
Grey Duck is Fun -- You just cannot beat hanging out on the water with friends, paddling, laughing, jumping in the water, checking out Lake Michigan shallowater shipwrecks, sitting by a campfire on the beach, and just having fun!
Shipwreck of the Major Anderson, lost in 1871, a 3-masted barkentines ship.
~ Jody Henseler
Grey Duck Brand Ambassador
Most paddles you find will be an adjustable paddle, meaning you can change the height by a handful of notches. This is great if you are sharing a paddle with multiple people. Especially when those paddlers are different heights. Just be aware that when you buy a paddle, there are different sizes. If you are sharing between a person that is 5’ 2” and a person that is 6’ 4” it likely won’t adjust enough to properly fit both of you. It’s a good idea to check out the height range before purchasing a paddle and make sure it works for the primary paddler(s).
There are also fixed height paddles which are great for a person who knows exactly what height they like in a paddle, and are not planning on sharing with other paddlers. They can be a bit lighter because they don’t have the additional adjustable components but for the average paddler, I’d recommend sticking with an adjustable option.
Choosing a Paddle Height
Once you have your paddle, it’s time to adjust it to your height. Get it ready so you can easily slide the adjustable portion of the paddle up and down. Hold the paddle next to your body and rest your dominant hand on the top of the handle. Raise your arm straight up and then give yourself a little bend in the elbow. You don’t want to be over-stretching or have a 90-degree bend in the elbow. The top of the paddle should be about 6” - 12” from the top of your head. Find a comfortable resting spot and lock in your paddle height. You may have to shimmy it up or down a bit to get it to the next available notch. Make sure whichever way you go (up or down) feels comfortable. If you are in between notches, you may want to test out both options and see what works best for you.
How to Hold Your Paddle
Now that your paddle is sized to you, it’s time to talk about how to properly hold the paddle. Hold your paddle out in front of you with straight arms and make sure your hands are wider than your shoulders. If you are paddling on your left side, your right hand will be on top, gripping the handle. If you are paddling on your right side, your left hand will be on top. You will continue to switch your grip as you switch sides.
You will also want to keep your arms fairly straight throughout the majority of your stroke. Many new paddlers have the tendency to bend their arms because that’s how you would paddle in a canoe or kayak. However, if your arms are bent, you won’t get a very powerful stroke and will likely end up working harder to propel yourself forward.
Lastly, the blade of the paddle should always slope away from you. This is the most common mistake that paddlers make because it feels like the blade should be scooping the water. However, this will slow you down by creating more of a drag and make paddling much more difficult. A good check is to hold the paddle upright and make sure the end of the blade is pointing away from you. Keep an eye on the direction of the blade as you practice paddling on both sides and switching your grip.
While it may feel like a lot to remember the first few times you get out on your paddleboard, it will become second nature fairly quickly. Developing good habits and proper form will help make your experience much more enjoyable. At the very least, it will at least keep other paddleboarders from yelling ‘turn your paddle around’!
]]>What to Bring
There are a few documents and pieces of information you will need to bring with you when you are registering your paddleboard. First, make sure to have some kind of personal identification. Second, you will need some kind of proof of purchase. An invoice or receipt will work best. They are looking to confirm that the proper amount of sales tax was paid at the time of purchase. If you did not purchase your paddleboard and was gifted to you instead, you may also need to bring a signed document from the original purchaser that the board has been gifted to you.
In addition to those documents, you will also need to know a few details about your paddleboard. You will need to know the length of your board, the make and model, the year it was built, and you will need the serial number or hull identification number. The serial number or hull I.D. should be around 12 characters and you can usually find it located on the bottom of your paddleboard near the main fin. The official watercraft registration application can be found here if you’d like to review it further.
Where to Go
You can register your paddleboard at any DMV office across the state. If you live in the twin cities area and would prefer to go to the DNR Licensing Office, you can generally skip the long lines of the DMV. The DNR Licensing Office is located at 500 Lafayette Road, St. Paul, MN.
Renewing your Registration
The good news about registering your paddleboard is that it only requires you to complete the paperwork in person once. As soon as your paddleboard is registered, you can renew your registration online. Registration is good for three calendar years and the stickers you will receive for your board will include the expiration date of your registration.
Written by Brand Ambassador Emily Carey
]]>Most of the inexpensive SUPs on the market are built out of rotationally or blow-molded polyethylene. It’s a process that is extremely efficient and cost effective – which keeps the final product price low. These are also very durable, very heavy, and poor paddling products. It’s a space we don’t play in, so we prefer not to get too deep into the weeds on this type of comparison because the customer who wants the cheapest board around isn’t the customer that will find our products appealing. Generally speaking, the type of construction drives the final price of a SUP. Within each type of construction, there is can be varying levels of quality, so know that there are exceptions to the general rule.
COST |
CONSTRUCTION TYPE | PROS | CONS |
Low | Molded Polyethylene | Inexpensive, durable | Heavy, poor paddling experience, "cheap" looking |
Soft Top | Relatively inexpensive, lightweight, relatively good paddling experience, good value | "Cheaper" looking, not easily repairable | |
Middle | Thermo-formed | Durable, easy to repair, affordable, lightweight | Fewer options for board shape, board "look" not as refined as composite boards |
Inflatable | Durable, easy to store and transport | Not same paddling experience as hard board, may spend time inflating before use and deflating after use | |
High | Composite (Epoxy) | Largest variety of shapes, lightest weight, highest quality fit and finish, best performance | Cost, less durable than other construction types |
We produce products in the premium space – one that is very competitive, and where there are still large differences in how much time, effort and quality goes into a board. We’ve literally traveled the globe to personally visit production facilities, worked side by side with our factory owners and workers in Shenzhen, and spent almost a decade dialing in best practices to bring you the highest quality products we possibly can. I’d like to spend time diving into our composite board offerings, as this is where the highest prices are, and where the most discerning customers will appreciate differences between the brands they are considering.
I’m going to start with what I feel is probably the most important aspect to any board – the shape. Composite construction allows for complex board shapes that can be dialed in for a specific type of person and the style of riding they’d like to do. Our shapes are unique to Grey Duck, and are something we are very proud of. Each brand of SUP on the market will have their own unique shapes that cater to certain types of riders and offer a feel on the water that is unique to their brand. To compare boards from different brands based on specifications is a starting point, but making a buying decision without really getting a feel for the on-water performance would be like buying a car based on researching the car without driving it. Cars often seem very similar based on their specs, but once you get out for a test drive they often have wildly different ‘personalities’. Boards are the same way, and the shape of the board is foundational in the experience you’ll have on water.
While we have many different models in our lineup, and different shapes for each model, we try to maintain a fairly consistent brand ‘feel’ on the water. For example, our All Day and Daybreak models, while differing in both length and width, have much of the same DNA in their shape. Riding a Daybreak and then riding an All Day would provide a different experience, but both would deliver a ‘Grey Duck’ feel on the water. The same could be said comparing our Journey and Quetico touring shapes.
Our boards are CNC machine shaped, so that we can guarantee consistent shape and experience for our customers. Some brands market their products as ‘hand shaped’, which sounds more boutique (and is great for marketing!), but can lead to shapes morphing over time and not delivering the performance that was originally intended. When we develop a new board, the prototype boards are hand shaped for testing. Once a shape is determined to work well for the intended use, that board is then scanned so the shape can be captured electronically and then used moving forward on the CNC shaping machine.
Below are pictures of a board being shaped via CNC machine:
The core of our boards is EPS foam, which is then reinforced with high density foam where component pieces such as handles, fins, and leash plugs will be added later in the construction process. This is not something that other manufacturers always do, and we feel adds to the quality of our composite products. This process of adding high density foam in specific areas where components will be placed (or what I refer to as ‘core bracing), results in added durability and a more structurally sound product.
Below is a picture of boards where core bracing has been added where key components will be placed:
After the board is shaped and the core bracing is added, the board then goes to through the process of lamination. We use what is often referred to as ‘sandwich’ construction, which involves bonding multiple layers of fiberglass and wood veneer together with epoxy resin. All of our composite boards, regardless of whether you can see the wood veneer in the final product or not, have layers of wood veneer as part of the lamination. On the regular versions of our boards, we use bamboo in the lamination process. On our Zebrawood products, we use a Zebrawood veneer in the lamination process. Regardless of the species of wood used, that layer of veneer is structural, and creates a board that is both lighter and stronger than using just fiberglass in the construction. You will often see less expensive composite board offerings from other brands with a ‘wood’ look to the final product, but the board is actually built using just fiberglass and epoxy, and the ‘wood’ look to the finish is just wood printed on paper and then laminated into the board. It’s obviously less expensive to build a board this way, but we like our approach and feel that the extra cost is worth it.
We also vacuum bag all of our composite boards during the lamination curing process. This helps ensure the epoxy resin penetrates the fiberglass thoroughly and evenly, resulting in the strongest board possible for a given overall weight. Vacuum bagging adds additional cost to the process, but we obviously feel the result is superior and believe the extra cost is worth it.
Below is a picture of boards during the vacuum bagging process:
If someone chooses a board with our HIPtech construction, they’ll be getting a board with all of the above technology built-in, but also an added outer layer of polymer applied to the board. Think of HIPtech in the same way you’d look at bedliner applied to the back of a pickup truck. It’s an added layer of durability for riders who want a more bomber product.
After the lamination is complete, the board is then sanded, painted, polished, etc. This is where the ‘look’ of the board becomes clear, and another area where quality between brands becomes apparent. Board manufacturers that don’t sweat the details will often deliver products where fit and finish is lacking. A poor job of taping the paint lines before spraying the paint can result in overspray, poor paint lines, or asymmetry in the final look of the product. And even if the paint job is great, if the board’s gloss coat is over polished it can leave a dull haze or ‘cloudy’ look to a board.
As you can see, there are many points along the way in which building a high quality finished product can get sideways and go wrong. Products that both look great AND perform well are harder to build than most people think. Once you start to appreciate not only the fit and finish, but also the shape and performance it becomes easier to see where the extra dollars are being spent.
Finally, there is one other aspect to consider in a board. It’s the functionality of the design. For example, on our Quetico model, we offer a sit/carry system that is unlike anything offered by any other manufacturer. The creativity and thoughtfulness in the small details you see on the outside of the board are reflective of the thoughtfulness in which every other component of our products are built. We sweat the small stuff, and we’re constantly trying to improve on the value we deliver to our customers.
We hope that we’ve given you a glimpse into our manufacturing process, and what we feel is important. As always, we’d love to hear from you if you have any questions. We’re here to help you make a buying decision that you're proud of.
]]>Towards the Front
Placing your fin towards the front of your board allows you to have greater control over your board. It’s helpful for surf conditions or maneuvering your board quickly. This may be a good option for lakes that require you to maneuver larger waves, or in smaller channels or waterways.
------------
Towards the Back
Placing your fin towards the back of your board will allow you to track straighter. This is helpful for long-distance paddling when you are focused on going further and want to paddle efficiently.
------------
In the Middle
You can also split the difference and place your fin in the middle of the slot. Positioning your fin here will give you the best of both worlds. You will still have decent control over turning and will track fairly straight on the water. This is a perfect option for casual paddling or all-around use.
Written by Brand Ambassador Emily Carey
]]>Set the rear of your first board on top of the towel in the base of the truck bed with the traction pad facing downwards. Repeat this step if you are hauling an additional board. Be aware that you will need to remove the fins prior to placing the boards in the truck. We have found that placing the rear of the board in the bed first is more suitable than the nose of the board. Using the towel will protect against any unwanted scratches.
Next lift the nose of the boards up so that the tailgate shuts and the boards are resting on top of the towel and the top edge of the tailgate.
Now that the boards are in position, set up your ratchet straps to be placed horizontally over the boards. Start by tightening the straps over the rear of the top board. This will ensure that the boards stay in contact with the bed of the truck. Next, tighten the straps towards the nose of the boards. Make sure the straps are firm in both positions, but be careful not to put too much tension on the boards. A good way to know if the straps are too tight is if the tailgate leaves an indent on the traction pad.
If your boards extend more than four feet beyond the bed or body of your vehicle you are required to display a red, yellow, or orange flag/cloth no less than 16 inches square at the extreme edge of the boards. A good way to secure the flag/cloth is by tying the flag to the tie down system- another reason we prefer having the nose of the boards hanging over the tailgate. Your boards are now secured and ready for adventure! Place your paddles, life preservers and any other gear underneath the boards and GO PADDLE!
Author - Spencer Specht
]]>It's also a dangerous time of year to be out on the water. Always assume you could end up in the water. With low water temps, it's critical that you're dressed for being IN the water.
Here's a picture of the key gear I wear when stand-up paddle boarding in cold water:
1) Leash - Rivers are typically the only type of water that is open this time of year, due to the fact that water is always moving. This also means that if you happen to hit a submerged object and you end up in the water, you want your board to stay close to you. Wearing a leash helps ensure that your board stays close should you end up in the water.
2) PFD - PFD's are always important to wear, but many people during the summer months use inflatable belts or just let their PFD sit on the deck of the board. During cold weather paddling, it is critical to be wearing a PFD at all times (and not the type that needs to inflate, it's just too risky under these circumstances).
3) Dry Suit or Thick (7mm) Wetsuit - Assume you'll end up in the water. And not just for a few seconds. Being prepared to be in the water for an extended period of time just makes sense. Don't risk your life thinking that you won't fall in or that you'll be fine if you do. Be prepared!
4) Water Shoes - I wear a dry suit, so booties or shoes that you can walk in not only are comfortable and provide insulation, but also protect the dry suit from damage.
The National Center for Cold Water Safety is the gold standard as a resource for more information on cold weather paddling. It's well worth the time to review their site extensively. Here are their 5 Golden Rules:
1) Always Wear your PFD
2) Always Dress for The Water Temperature
3) Field Test your Gear
4) Swim Test your Gear Every time you go out
5) Imagine the Worst that could happen and Plan for it
I hope this information is helpful. Please get in touch with any additional questions or comments!
]]>On a hot sunny day, there’s no better place to be than out on a paddleboard, and if you have a dog you don’t want them missing out on what could be a great adventure for both of you!
The first time I was out on my board, I knew my water-loving dog, Stanley, would love to be there too. I really wanted him to be able to come with on my lake adventures, and to be sure that paddleboarding was something that we could do together throughout the warm months.
A few weeks ago, my boyfriend, Spencer and I packed up the truck, our dogs (Stanley and Stache), and were set for Lake Maria to get their paws wet for the first time on the boards! While it was a very wet experience, I am happy to write that the pups are now standup paddleboarding pros! We compiled some tips and tricks below to help owners and their dogs get acclimated to exploring the water together for the first time.
It was so fun to be able to have our dogs along for the day at the lake. We didn’t know what to expect or how the dogs would react to the water, but it has now become something they really enjoy! When they see us loading the paddleboards into the truck, they immediately jump in the back seat in preparation for the next adventure.
While it can take a lot of patience, and depends on the personality of your pup, bringing them with you on the board is definitely worth a shot. Stanley and Stache really seemed to enjoy being out on the water and are getting more and more comfortable with each visit to the lake, and Spencer and I are so happy to have them along. After all, it’s the dog days of summer!
]]>
Roto-molded or Blow-molded Polyethylene:
Boards that are built out of polyethylene are tough. Just like many of the kayaks that are built of the same material, they can take a beating from rocks, docks, and just about anything else you can throw at it. It is also an inexpensive construction method, resulting in a price point that is reasonable vs. alternatives. Prices for plastic molded boards are typically in the $400-$500 range, depending on size and features.
The downside is that these boards are heavy (like 50-60lbs heavy). About twice as heavy as a higher end board. This translates into more difficulty moving the board around when it is out of the water (sometimes a two person job), and a very sluggish paddling experience on the water. These boards are typically purchased just based on price, as anyone who has paddled them know that almost any other construction provides a better on water experience.
Bottom Line: These are great boards if durability is your main criteria. Greyduck doesn't not sell any boards with this type of construction.
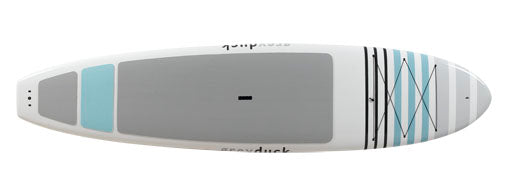
Soft Top:
Soft tops are a relatively inexpensive and lightweight option for people who want a more traditional SUP experience both in and out of the water, but in a less expensive construction. Most soft tops will weigh about 30lbs - half the weight of other inexpensive options. Soft tops typically have a traditional EPS (expanded polystyrene) foam core. Over the core a soft top is typically wrapped in XPE (cross linked polyethylene) or EVA (Ethylene-vinyl acetate) foam on the top and rails of the board, with a HDPE (high-density polyethylene) bottom. Some soft tops may have fiberglass between the EPS core and the outer foam covering (these boards would typically be on the higher end of the cost spectrum due to this added layer of construction). Costs for soft top boards typically run between $400-$900, depending on the board size and materials used.
The downside to soft tops are that they are don't typically have the life span of other types of boards, as foam can break down over time (especially when over exposed to sunlight), and aren't as easily repaired when damage occurs. With that said, they tend to be a good options for someone who is price conscious but wants a lightweight board that is easy to transport and performs fairly well in a variety of conditions.
Bottom Line: A good option if price and weight is your main criteria.
Greyduck board of soft top construction is the SOL.
Epoxy:
Epoxy construction is a general term to represent a combination of materials (such as fiberglass, carbon fiber, wood veneers, etc) bonded together using epoxy resin. This style of board is the most common on the market and is what most people see when they think of a paddle board.
Epoxy construction has many benefits. The board shape can be more complex, the board weight is as light as it can be, and the finished product can take on just about any look the designer wants to carry out. Epoxy construction is infinitely repairable, in that the epoxy resin and other materials can be used to fix any damaged area.
The downside to epoxy is that is typically the most expensive construction method and is more easily damaged upon impact with sharp or hard objects (rocks, docks, etc).
Epoxy boards can have a huge range of costs - generally anywhere from $600-$3,000. Why such a large range? Fiberglass, Carbon Fiber, Wood veneers, etc all have different raw material costs, and when combined in different ways and in different amounts can have a dramatic difference in the final board cost. Not all epoxy boards are created equal. A board just using fiberglass and epoxy resin should be less expensive than a board that also has carbon fiber or wood veneer. How these materials are used together, or 'sandwiched', are an important part of the final product.
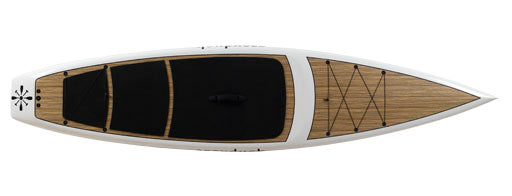
Bottom line: The best option if the look and board performance is your main criteria.
Greyduck boards of epoxy construction are the Daybreak, All Day, Journey, and Quetico.
Polymer:
Our HIPtech (High-Impact Polymer technology) construction is a combination of epoxy, fiberglass and polymer that has many of the advantages of epoxy construction, but with increased durability. There is an elasticity component to this construction that allows the board to take on greater impact before cracking or breaking. There is a slight weight addition to boards constructed this way - typically adding approximately 2 lbs over epoxy only construction.
Bottom line: A good option if your looking for both performance and durability.
Greyduck boards offered in HIPtech construction are the Daybreak, All Day, and Quetico.
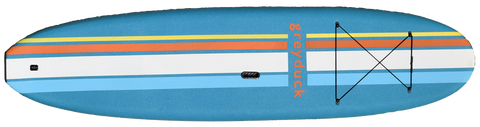
Inflatable:
Inflatable boards are perfect for anyone who doesn't have the space to store a hard board, or wants to be able to more easily get their board to where they want to paddle. They easily can fit into a car trunk, or a storage compartment on your boat, and can be checked as luggage when traveling by air.
Additionally, inflatable boards tend to be very durable and hold up well in harsh conditions.
The downside to inflatables is that the don't have quite the same performance as a hard board (although high end inflatables are getting close), and you have the time and energy used in unpacking, pumping, deflating, and repacking after use.
Quality varies considerably between brands. As a general rule, expect a high quality inflatable to be as much as a high quality epoxy board. Additionally, there are large differences in the quality of the storage bag and pumps between brands. Cheap boards will come with cheap bags and pumps, and vice versa for higher priced options. There is a very clear difference between a high end inflatable and a low end inflatable when you compare them on the water, pumping them up, and transporting them.
Bottom line: Inflatables are a great option if you like to travel or are space constrained, and you want a 'go anywhere' option.
Greyduck does not offer any models of inflatable boards.
We hope that clarifies some of the differences between different types of boards. Should you have any questions, please feel free to get in touch with us!
]]>1) Planing Hull (Round Nose)
2) Displacement Hull (V Nose)
Boards with a planing hull tend to be 'All-around' boards that do well in a variety of conditions. They can be paddled in flat water such as lakes, rivers and ponds. They are also at home in the surf. They are described as 'planing' hulls because when used in the surf, the board is planing over the surface of the water as you ride down the face of a wave.
All-around boards are popular options because they are:
1) Stable - they are the most forgiving shape for beginner paddlers
2) Versatile - they can be loaded down with weight and still maintain stability
3) Relaxing - they are easy to paddle and easy to get on and off of, even in deep water
Below is a picture of our 11'2" All Day All-around board
Boards with a displacement hull are built to cover more ground as efficiently as possible. A displacement hull refers to the V-nose, which 'displaces' water as the board travels forward. Displacement hulls are the best choice for anyone not venturing into the surf and is primarily using the board for exercise, touring, or racing.
Displacement boards are popular options because they are:
1) Efficient - the boards has more forward glide with less effort
2) Speedy - hull design translates your effort into more speed
3) Challenging - displacement boards tend to be less stable than an equivalent sized All-around board
Below is a picture of our 11'6" Journey displacement hull board:
There is not one shape that is better than the other. It's simply a matter of matching the shape to how you'll most often be using the board. If you question what shape is right for you, find a retailer that is willing to let you test drive them both so you can experience the differences first hand.
]]>